Showing posts with label Photography. Show all posts

Friday, 16 April 2010

Easter Weekend and Derbyshire delights

Ok. So last weekend was a while ago now. Especially since my non bloggable issues, the airline industry coming to a hault with the Icelandic volcanic ash (which rather amusingly no one on the BBC can pronounce - so just aren't,) and the bit political debate last night.

BUT last weekend we stayed at Mottrum Hall in Cheshire. In retrospect, given my tum, we maybe should have stayed home. But those who know me, know I do have a determined streak at times. And this was planned. The place is grand from the outside, and has a nice spa and relaxation area. I got all the info from my manicurist on who is a member. It's footballers wife's country. Carlos Tevez, Wayne Rooney, Michael Carrick are all members apparently. And Sir Alex used to be. Some of the Chelsea team were staying in an annexe on the Friday night before the game. Not that I saw any and the less said about Chelsea the better.

Given all this, the rooms are not actually that swish. I mean they are fine. But could probably do with updating. Good breakfast mind.

We tried eating out a couple of times. Bad move on my part. Should have taken a picture of Jonny's face when I ordered the muscles one evening. I mean really. Of all the things to order.

Our time "out" was in Derbyshire on the Sunday. It really is beautiful. Stunning in fact. We visited Buxton briefly only to realise everything was shut on Easter Sunday, but was pretty to see anyway. I post a couple of pics of us out of the car and looking far more active than we actually were, and far less rainy than it actually was. Still loved the fresh air though.

Our time with the family on the Monday was lovely. It was great to see everyone and to see our nephews getting on so well. I think the activity books we chose were a hit too. As Jonny had work to do in Manchester on the Tuesday my sister in law introduced me to the Trafford Centre. Oh and a stop at her favourite local boutique, where I may have purchased a top...

Friday, 5 March 2010

Sunday, 14 February 2010

Photographs of Camilla, Lucy and Me

I have just been sent these photographs which were taken by the Hello! photographer at the fashion show on Thursday evening when we were talking to HRH. I doubt they will make it into the issue (as I am not really celeb material!) but all very exciting anyway:


Sunday, 3 January 2010

New Years Resolution Number 157

Get on my bike.

Am just back from a cold but lovely bike ride in Richmond Park. I looked out the window this morning while reading the Sunday paper and decided it was too nice a blue sky to miss out the park today. Not been on my bike in far too long. It was really lovely. Look what I live next to:


It's not always easy to get in the zone of just enjoying what is. Of seeing other people, out and about, whom I presume don't live with elephants.

But I feel good for the fresh air and the exercise. And the park is a good place be.

And yikes. United are 1-0 down to Leeds at Old Trafford right now...come on United. Sort it out. Otherwise I will have a grumpy husband return home later. And I don't think pictures of deer and talk of bike rides will lift his spirits.

Saturday, 31 October 2009

South Bank Photography

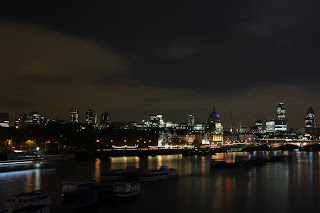
Like I said in my earlier post, my photo attempts from the South Bank last night were rubbish. Here is a better shot that I took last year when I had all the proper gear with me:


If you have any interest in how you get this kind of shot then basic guide on your digital SLR would be:

  • Set your camera to fully manual
  • Camera on tripod or very stable surface at correct height - you cannot hold the camera as you will get "camera shake"
  • Set shutter speed to 30 seconds (this eats your battery but is needed)
  • Adjust your aperture manually until you get the degree of exposure you want

This can work particularly well if you have a moving image too like the millennium wheel:

Steady hands needed for this kind of photography. I didn't have these last night either as I maybe had a glass or two of fizz.

Friday night on the South Bank

I spent yesterday evening in town. When I was working in central London I sometimes really used to hate it. There are so many people, so much traffic and as my job often involved heading across town to go and meet clients, I was always rather stressed that all these people, cars, buses, tubes were working against me.

These days, as I am not working, if I head into the centre of town, it is usually a much better experience. I took the bus across Waterloo Bridge up to St Paul's. As it is getting dark just after 5 now, it's actually pretty darn cool. The Houses of Parliament and Big Ben are all lit up and the views along the river are great. This time last year I was on this Bridge learning about night time photography as part of a 10 week evening class I took. As part of that very same course I did a project on St Paul's too - it was a bit dirty then - but they have now finally finished cleaning it up and it looks amazing actually. It's one of those ironies of life, that when you live in any city, you rarely make the most of everything it has to offer because life is just too busy. Jonny has been working next to St Paul's for about 6 years now, and has still yet to go inside.

Anyway, it is a clear and still evening. We wander from St Paul's across the Millennium Bridge to the Tate. I try to take a few photos on my digital compact that don't work very well at all. It makes me appreciate that I did learn quite a bit on my course and I need my SLR and a tripod to get a decent shot of St Paul's in all it's glory.

We've had membership of the Tate for a few years now, but again, so rarely use it. We are not meeting our friends for a couple of hours so head up to the members bar there. Jonny is too tired after a mammoth week at work for checking out any of the art. I've not been in here before. It is very understated, with it's main winning card being the views out across the Thames. Obviously all the seats by the window are taken but we relax and on the couches and catch up on what is going on. I've hardly seen him all week and even though he is tired, this is better than vegging in front of the TV as we talk more. I enjoy it. I think the Tate have got the market just right here. They offer drinks and tapas, which is kind of perfect if you have just been looking at art. Or like most of the people in there, are using it as a pit stop after work.

We then wander along the South Bank to the Royal Festival Hall to meet our friends. The South bank has improved massively. I can remember coming up here years ago and it being pretty run down and depressing actually. Nowadays, there are all sort of cafes and restaurants which maximise the outlook across the Thames and give for a nice understated buzz about the place.

We eat at Skylon, which is the fairly new restaurant at the top of the Royal Festival Hall. It seems we are not to get a view this evening, as our table is far from the prime river view ones at the front. Still the high ceilings and general setting still make for a really pleasant place to eat. The waiter is maybe too eager to take our orders. You can tell this is a really popular place these days, and you get the sense that someone else is booked onto our table in a couple of hours. Anyway, my fishcakes were nice and my apple tart tartin delicious, and the prices not too bad for a London restaurant in such a prime position. As an aside I think this is not the case with the Oxo Tower down the road - ok food at a high price.

The big bonus for us is this is a few minutes walk from the train back to Richmond from Waterloo, and fortunately one of us wakes up just in time for us not to miss our stop. It's chucking it down with rain when we get back. I think the South Bank would be less pleasant in the rain so am grateful that even though we didn't get a table with a view, it was clear and still when we were there. Note to self: should do this more.

Thursday, 29 October 2009

Last Chance to See

We finally got around to watching the Stephen Fry programme on blue whales this week. Absolutely loved it. He basically did the very same route that we did earlier this year, around the peninsula of Baja California in Mexico. I think he may well have been there the same time as us as there was definitely a BBC crew filming in the Sea of Cortez when we were there. The programme is firmly on "Keep" on our sky plus box and think we will be buying it on DVD if it becomes available as it is such good footage of what we did and saw. From touching grey whales to watching breaching humpbacks and getting as emotional as Stephen Fry when you get to see blue whales, it brought back amazing memories. Blue whales are on average 100 ft long, and the largest mammal ever to live on our planet. Yes that's right - even bigger than the dinosaurs. To see these creatures in their natural environment, and one of such beauty, is a truly humbling and incredible experience.

During the programme he comments that a photograph of a blue whale fluke is like the holy grail of whale photography. Well Stephen, looking at my hard drive here I am spoilt for choice... but here are a couple of my best shots:


I know I am not about to win travel photographer of the year, our friend Jules has already done that, but I was pretty pleased with these. Here's praying it wasn't really my last chance to see, but I know I am truly blessed to have seen them at all. They really are amazing.

Thursday, 23 October 2008

Portrait Session

It was time to get back into the studio and use our cameras. This time with real live models. One of my fellow students invited a couple of friends along to pose for us, and we had the job of taking photo's of them.


Before we heading down to the studio we has a quick briefing.


Posing do's and don'ts:
  • Don't turn the face away from the main light source
  • Turn the shoulders, waist and hips at a slight angle. Square on makes the body look wide
  • Align models chin to remove the appearance of a double chin
  • Look at the expression - wear a smile
  • Tilt the head
  • Use a catchlight - angle the lights to enhance a catchlight
  • Use long hair to fill an empty area
Camera settings

  • Don't use a wide angle lens. Use a medium telephoto. 105 is perfect for head and shoulders
  • Set shutter speed not below 1/60th second. 125 is perfect.
  • If in studio setting (as we were) set the camera to daylight on the White Balance setting.
  • Aperture will vary but usually F8 - F11 is good.
  • Keep ISO as low as you can to minimise grain. However depends on lighting you are using. I found I needed to increase the ISO, especially for the low key portraits (see below)
  • Try to focus on the eyes
We had two different types of backdrop set up. One was High Key. This means lots of bright lights and a very white background. The key to this type of portrait setting is EVEN lighting. The second was Low Key. This is using minimal lights to create a very different effect. Here you are looking to use the shadows cast by the Key Light to reveal texture, modelling and detail in the subject. Low Key photographs are much moodier than high-key, and usually have dark or black backgrounds.

Here are some of my best shots (pre photoshop can I add!):


Jo Blogz Version of a David Hockney Joiner

I am loving learning more about photography. And I am finding myself getting a bit frustrated with those who think it's just about recording something that happened. I do accept that we are all different beings though. Last week at college we interestingly looked at some of the work of a professional photographer who got frustrated with photography itself. And that was the famous photographer David Hockney.

One of Hockney's frustrations was with the the lack of time in a photograph. That is does just take one moment, and that in reality these are just instances within a series of events. He still loved photography though, and was not about to give up in it all together. His solution was to create a "joiner" to capture the greater feeling of time and space than any traditional photograph would. What his technique involved was taking a series of photographs of elements of the moment and then literally joining them together like a big jigsaw to capture the event. This technique was done pre-photoshop, and rather than creating one smooth image, it captures lots of moments, which when joined together demonstrate what has happened.

We watched a video to show this technique - which showed a movie camera shooting the same scene as he photographed. He argues that his result was more powerful than a movie as it allows the viewer to linger on different moments, rather than them just passing. For example the expression on someones face when they had solved a crossword clue, and the expression when puzzled - rather than these moment just passing as they would in real time. I found this technique quite fascinating.

Good job I was interested, our homework was to go away and create a joiner for ourselves. So, last weekend I headed up to St Paul's, and stood taking many many photographs of the building itself and of people sitting on the steps, passing buses, police cars etc. I took 222 photographs in total - the joy of digital! Individually each of these photographs will mean nothing but I hope when I piece them all together to create a big image of that Sunday lunchtime at St Paul's. I will add a picture of the homework when it is done.

Still Life Studio Session

This was one of the first opportunities to really get to "have a go" with our cameras. It was a real opportunity to be able to get into the studio and mess around with the different settings on our cameras. We were briefed to bring in something that was quick and easy to set up in the studio and shown some ideas. When starting out with still life photography, unsurprisingly simplicity is key. The tutor showed us some more complex sets that he had assembled and photographed, but the more things there are in the image, the more there was to think about.


Ideas were:

  • Fruit and Vegetables
  • Leaves
  • Conkers
  • Flowers
  • Books
  • Toys
We also looked at some of the "tricks" that can be used in still life - for example using glycerin on items makes it look like water drops on the item.

Before we got into the studio we also spent a little more time thinking about ISO. The higher the ISO the more grain you get in an image - so in our still life setting we want to keep the ISO as low as possible (100 or 200). In a different environment a high ISO is necessary - for example when Jon took some images of Morrisey in concert when at college he needed an ISO of over 3000.

Back to our still life briefing - we also needed tripods for this. As an aside I am still yet to purchase a tripod, but the advise is that you get what you pay for. If you spend £20 on one then you probably won't get much life out of it, and it will be very flimsy, hence defeating the point of having one, which of course is to illuminate camera shake for clarity of images.

Into the studio and it was great fun to snap away. I brought in a selection of tropical fruit. Here are a couple of pictures I took - before they are "photoshopped" later in the course!


In a Flash

During one of the classes a couple of weeks ago - just ahead of our still life studio session which I will come on to talk about - we looked at the use of flash. We've all probably used flash on our cameras - and got annoyed with the "Red Eye" effect that we can get. This is caused by the intense light from the flash travelling down the iris and reflecting on the veins at the back of the eye. This is the "bounce" flash effect. With modern day Photoshop techniques, we can eliminate red eye with some brush strokes on the computer.

There are, of course, some other techniques for the effective use of flash. The teacher illustrated this with a picture of a robin in flight that he had taken. In this particular example the tutor had used "Fill in flash." This has the effect of just "filling in" or "highlighting" a section of the photograph or image in the photograph. It is a more subtle effect. On the robin illustration, it meant that the robins red breast and face were highlighted, but not the background - very effective. You need to be relatively close to the subject to use this technique.

The contrasting technique to this is "Full Flash" In this type of flash technique you are trying to light everything, as you want the full image captured. Whilst full flash will achieve this affect, the downside is that you can get very harsh shadows.

We also talked about "White Balance" This was a new term to me. To the human eye, a white object looks white regardless of the type of lighting. However, with photographic techniques, white can come out yellow or green or blue - depending on the type of lighting that is being used. With a digital camera, the colour temperature is adjusted with software to make the white areas look white. This adjustment serves as a basis for the colour correction. The result is natural-looking colours in pictures.

The following week we are going to be in the studio and using "softbox" lighting. The beauty of using a studio with all that equipment is that no flash is needed and therefore I can use the "daylight" setting for white balance.

It is worth bearing in mind though, as touched on above, that with modern photoshop techniques, a lot of the "problems" of shine / reflections / white balance can be adjusted using photoshop on the computer. I guess that can just make us lazy with learning the correct use of flash - however I think there are still techniques worth utilising when using flash to light our subjects to achieve the photograph we would like.

Saturday, 27 September 2008

Out in the Dark

This week we went outside and started using our cameras, which was fantastic. But firstly it was time to have our photographs we had collated for homework assessed. I was one of the first up to have my work looked at, and as I had emailed my images to the tutor, they were up on the screen for all to see. Thankfully, overall the feedback was pretty good.

The first picture of Kew got a good critique in terms of the framing of the shot, and the way the eye is led from the crocuses up to the building behind. It could be cropped slightly on the left apparently, and the crocuses could have been slightly more in focus had I made better use of aperture. Obviously I took that photo on the automatic setting, but by the end of class this week I understood the need much more to adjust the settings on my camera.


The second photo of Half Dome was much admired. I was chuffed with this, but frustratingly this was taken on my digital compact using the automatic settings, rather than my fancy new SLR! We talked about the famous photographer Ansell Adams, who took many truly wonderful photographs in Yosemite long before the digital age. When we were in Yosemite we visited the Ansell Adams gallery and also purchased a photograph developed from one of Ansell Adams original negatives, which is proudly hung in our hallway at home. I can only dream that any of my photographs would even come close to his work. The other amazing thing about Ansell Adams photographs is that they were taken way before the digital era. Whilst many photographers these days can manipulate and enhance their images using digital technology with Ansell Adams it is the real deal. With my photograph we could only comment that I had centred the camera well and the camera had done a good job on the rest. If you ever get a chance to look at the picture in our hallway you can see how it's really meant to be done.


The other students had brought in a mix of different photo's. One of the most impressive was actually taken on a Mobile phone of a street scene in Hong Kong. The student had taken three pictures and merged them using a photographic package on the computer, and I can tell you it looked pretty good. We also touched on how we are going to be able to use Photoshop / Photoshop Elements to adjust our images. The tutor quickly erased a poll from a beautiful beech scene on one students photograph in seconds. That's the only trouble with digital - we no longer know what is real.


We then moved on to talk about some of the technical terms shutter speed, aperture and ISO - those words I have never really understood. It turns out that depending on the type of shot you are taking, you need to adjust these to get the best possible exposure - or the best photograph you can. In automatic settings, which is what I have always used until now, the camera will adjust these for you, to produce what it thinks is the best photograph can. However, there are times when you need to tell the camera what it is you are trying to do, as it cannot work that out for you. For example, what part of the picture you are trying to focus on, or what affect you are trying to achieve. This became particularly necessary with the night time shots that we took later in class.


So what do these terms mean? In short, shutter speed is simply the amount of time that the shutter is open. It is the length of time the film or image setter is open to the scene that you are capturing. It can be adjusted on your camera in degrees of halving and doubling. Aperture is the degree that the lens is open i.e. the amount of light that is being "let in" through the lens. Again this can be halved or doubled on your camera. In film photography, the ISO measured the sensitivity of the film to light. In digital photography the same term is used to adjust the sensitivity of the image sensor to light. This will affect the fineness of your images. We were focusing on the impact of shutter speed and aperture for this weeks session.


So now I knew what these terms meant but was still somewhat unsure how these affected my photo's. The tutor had a clever website to explain this. By taking the same photograph using lots of different setting of changing shutter speed and aperture, we could see how one image could come out very differently in terms of exposure. Sometimes it was too dark, sometimes too light and it was the balancing act between these two variables that gave the best image. We then went on to look at the tutors own website of pictures he had taken, and how he had adjusted his camera manually to get pictures of the same image looking very different.


Time was pressing on and before you knew it, it was time for us to have a go. A great photograph of moving traffic taken at night, with streams of white light on one side and red lights on the other was projected up on the screen at the front of the class and we were told we were collecting our tripods and heading outside to take something similar ourselves. Having only just heard the concept I was struggling to see how I would be able to even get the effect but keen to have a go.


We were on a footbridge above a dual carriageway outside the college. I had just about figured out how to attach my camera to the tripod. A tripod is essential for this to get a stable image. Even with the tripod some of my images were all over the place as the bridge vibrated with the moving traffic beneath us. I started snapping at the cars as they past. Looking at my images on the back of the screen I wasn't getting the affect at all. "Dave. Help. What should my SS and Aperture be?!" Slow shutter speed. Of course. To get the lined effect I needed the camera to see the lights for a few seconds at least. My camera was set on a standard 1/60th of a second. Aperture didn't hugely matter in this situation - it was dark and the headlights were strong. I had another go. A different concept to the "click" I am used to, I pushed down the shot button and the camera "froze" for the number of seconds I had set it to. 2, 4, 8 seconds later and I had the effect on my pictures. Not even close to the one at the front of the classroom we had seen but I had the effect. Totally addictive I was the last to leave the bridge.


Below are some of the pictures I took.


This first one was taken on a 1 second shutter speed. I started to get the effect of the lines of the headlights.


This second one is taken on an 8 second shutter speed. I got the effect of the lines much better but it's not a great photo!


To be fair, to get the effect well we all needed a far greater volume of traffic. This is one of those rare situations on London that I actually wanted more traffic. However, it proved the point I needed to get my camera onto the manual setting to achieve some things I want to do with it.


My first proper assignment is to go away and take photographs of the same image adjusting aperture and shutter speed on my camera. This I will be doing over the next couple of weeks.


Thursday, 18 September 2008

Who knew cameras used to look like that?

This week I started a 10 week digital photography evening class at a local college. I have been very fortunate to have been bought a new digital SLR a couple of months ago, and I have been enjoying snapping away, but am keen to learn and know so much more about how to use it and what I am meant to be doing when I take different types of shot. My current knowledge is below basic. As part of our introductory session this week we all had to say why we had signed up to the course. When it got to my turn I muttered something about my husbund using words like "aperture," "shutter speed" and "depth of field" and these being words that I do not understand. Apparently by the end of the course I will be talking Jon under the table with my knowledge. Hmm, not convinced by that one at all, but am excited about the course. I was also relieved to be in the right room as the rest of the students seem to be like-minded ie we don't know much but would like to know more. My initial objective is to get the camera off the automatic setting, and start to understand more of what the camera can do and how to take different types of images. We were shown around the college and looked at their studios and equipment and discussed what we were going to be learning. All looks pretty ambitious for a 10 week course, but I keen to get on with it.

The instructor gave us a whistle stop tour of how camera technology has evolved massively, and we got to have a look and hold a selection of different types of camera. As he said, it's bizarre how emotional you can get over these objects, if you have any sort of interest in the subject.

The first camera we had a look at was an old Japenese twin lense camera. This has two lenses - a top lense for viewing and a bottom lense for focusing. You looked through the top to see the image and it used 120 film and despite it's antique appearance apparently can actually produce a very good print. It was a tired but beautiful object. I was moved by the fact that something so old and dated had, in it's day, enabled it's users to record images, capture moments and produce photographs to treasure, something they had not been able to do before. We take for grantide our snaps on the fridge, images in magazines and our albums of experiences, but once upon a time this now everyday commodity did not exist.

Next we had a look at a Lieca. This is a camera with a range finder, which used 35 ml film. The main advantage was the viewing lense on the top of the camera that you could look right through, rather than down into with the twin lense camera. The slight problem with the camera was that the image is actually slightly offset. I found this camera interesting to look at, but not as facinating as some of the others.

Next up was a Nikon F3. This is a 35 ml SLR. My immediate thoughts were how heavy and big the thing looked, but soon learnt that actually it brought a new dimension to photography as it was a complete system in it's own right. The size and weight is due to the huge battery case that is attached, but this can be removed and you can use the manual winder on. The huge breakthrough this had was that it could be taken anywhere due to the machanical shutter, no matter what the temperature. In fact there is one that has been left on the moon. Despite the many advances in digital photgraphy, in extreme temperature conditions, many of our modern cameras would just seize up and fail to work, a bit like my mobile phone has on ski lifts. The other disdavantage of this type of camera apart from it's weight is the single shutter speed of 1/60th of a second. Still not sure what shutter speed is used for / what the practical implications of this are, but will post once I have figured that bit out!

We then moved on to have a look at the Hasselblad. My initial take on this camera was it was big, and required lots of kit. Certainly not one to fit into your handbag on a girls night out. This took much bigger negatives, and gave the users much sharper quality. The other big advantage this camera gave, is it came with a spare back. This meant you could switch and change films, for example interchange between black and white and colour without having to discard the entire film. The final bit of history we looked at was the Sinar. This was used a much larger negative that the original Hasselblad, but very similar technology.

I enjoyed looking at these old objects and reflecting on the opportunities and limitations that each of them brought to photographers of their time. I also thought about how in my own life, I have seen, bought and yes broken, a few different models of camera myself. My first camera was a blue and white "Le Clic" camera from the Argos catelogue that I was bought as a birthday present as a child. I thought it was the business a the time, and far more trendy than my Dad's Canon. I then went into the disposable camera phase in my teenage years, which to be fair, had it's place as a light weight object which I didn't have to take any responsbility for. Given my record for breaking cameras this is no bad thing. Picture quality poor though from these things, rarely in focus and no ability to adjust your image at all. Even I found them frustrating. I had a fairly good automatic camera at university, although the red eye reduction never worked properly.. and then borrowed a couple of good compact film cameras from Jon, moving onto digital compact (um two of these as I dropped the first one on a rock in Tobago and smashed the screen oops) and now the Canon Digital SLR, which is a big step up for me.

I digress and reminise. The final thing the instructor showed us this week was his Nikon Digital SLR. It's mind blowing really how the technology has moved on. One back pack with your digital body and 3 good lenses (zoom, wide angle and long lense) and you are basically good to go for pretty well anything. A few extra bit's of kit will help. A tripod and a flash gun if you get really keen. No film, take as many as you like and the instant information you can get about your photographs from histograms etc on the screen is second to none. I hope to learn and understand better what all this information means as I progress through the course, but even from my basic starting point I can appreciate the flexibility and accessibility the new age of digital photography can offer. I found the Japanese twin lense camera a lovely object to look at and think about, but am grateful that I have the D40 to practice my shots on.

So, there you have it. Week one and I am in. Photography is so much more than just a record of events. It can be a science and an art, a hobby or a passion, an instantaneos snap of a moment or a carefully planned image. I hope to be able to create at least some images that I am proud of, and maybe that some others can enjoy.

My homework this week was to bring along a couple of pictures I have taken previously, and to say why I like them. Looking through my hard drive of well over 1000 photographs, I am acutely aware by how many there are that are poor, and that I now have to justify to my fellow students why I think they are worth showing. In the end I have chosen these two.


1. The first is this photograph that I took on our honeymoon in Yosemite of Half Dome. It was taken on a digital compact camera. Firstly I like it because it means a great deal to me personally. We hiked all the way to the top of there, which was a pretty special experience. Secondly I like the way the Half Dome is centred with the expanse of mountains behind. I also like the shadow on the rocks.

2. The second photograph I have chosen is this one taken in Kew Gardens earlier in the year, on my digital SLR. I like it because the beautiful bulbs are in focus at the front, but you still get the effect of them scattered across the grass up to the building. I also think this photograph evokes the sense of peace and quiet you get when you wander around Kew during the week, which is something that I like to do.

Next week we are going to try some night photography. I will be wrapping up and will let you know how I get on.